Manual
Requirements
PHP – Language
MySQL – Database
WordPress – Content Management System
Elementor – Pagebuilder
Gutenberg – default Pagebuilder, gets replaced by Elementor but still shows up every now and then when you create new content
Astra Theme – Themebuilder
You will encounter instructions like the following:
Administration-> Pages -> All Pages -> News
reads as :
In the Administration screen, click on Pages, click on All Pages, select the News Folder
WordPress
Elementor
The Elementor website builder overrides the default editor (Gutenberg) and allows WordPress users to create and edit websites by employing the drag and drop technique, with a built-in responsive mode.
It´s basically a What-You-See-Is-What-You-Get Editor to easily manage content and layout. It is complex & powerful but intuitive to use.
Elementor is a live page builder which we will use to modify content on our posts and pages.
There are many factors that make Elementor an excellent solution for anyone who wants change content front end and play with intuitive, handy tools in a live drag and drop mode. You really don’t need to know any code. You can easily change text and images, fonts and colors within a drag and drop environment.
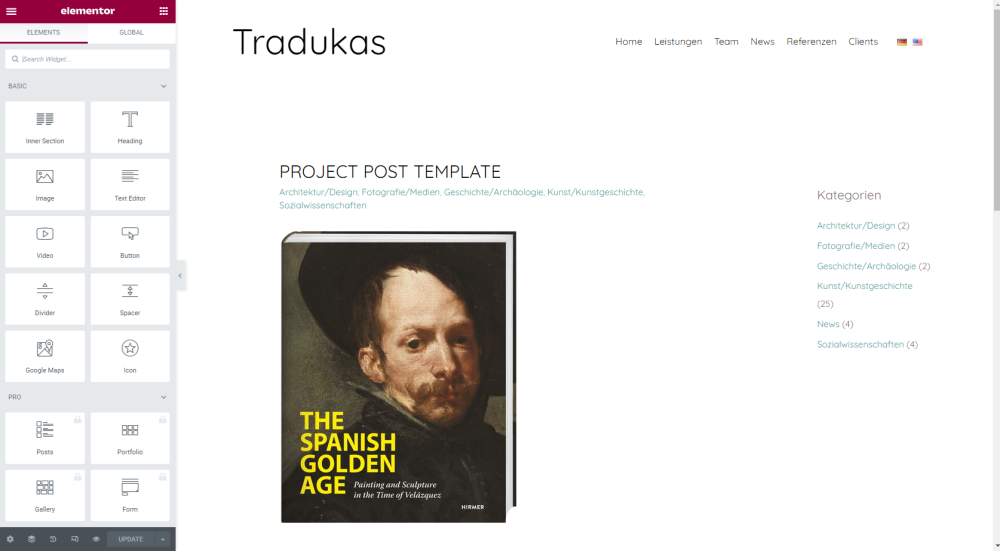
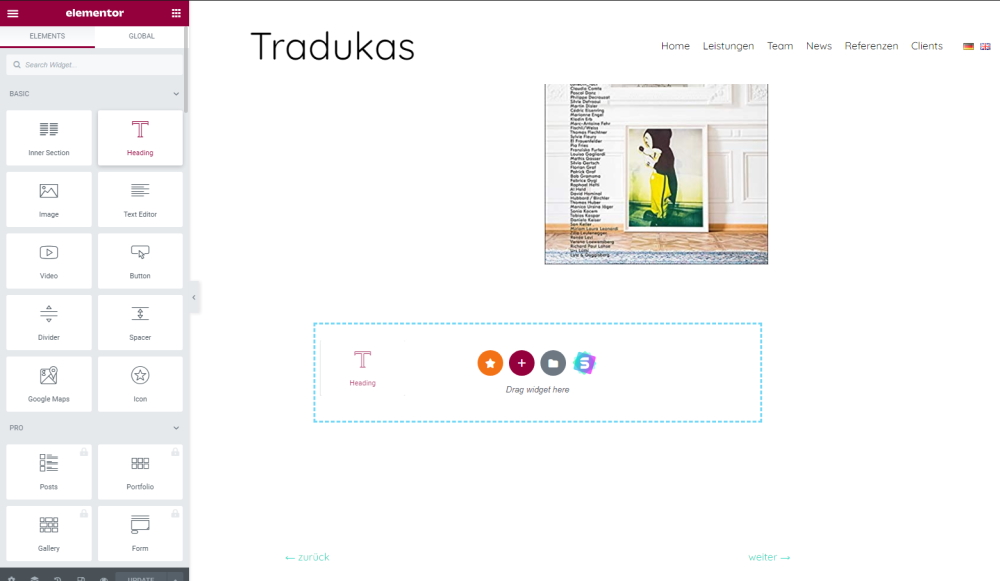
Once you chose to edit a Post or a Page with the Elementor editor, you’ll see that there’s two panes.
The pane on the right side is the editing screen of your site. This is where you add and edit elements that form the layout of your page.
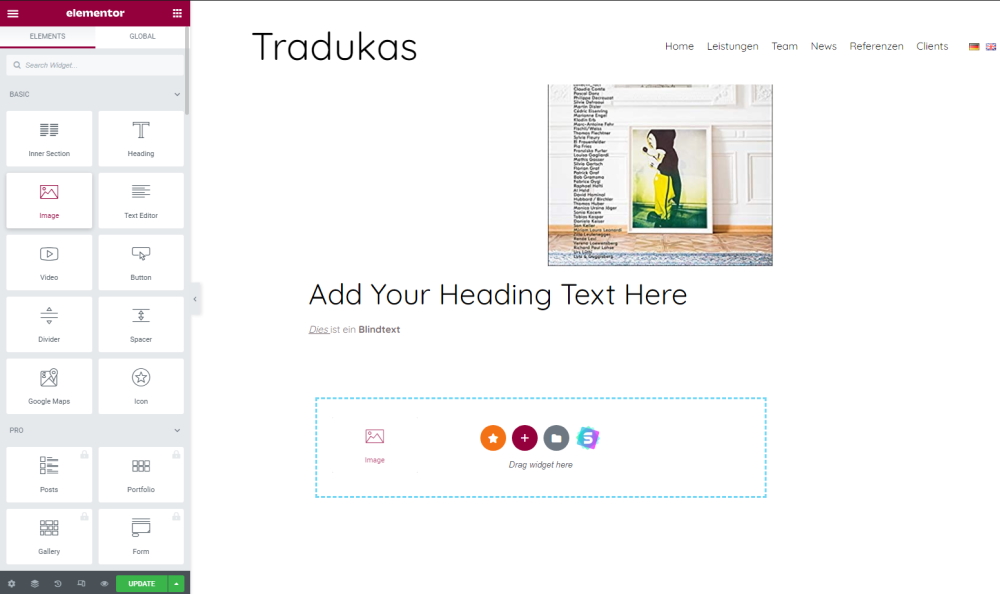
Over here on the left side is the elements panel, and this is going to house all of the creative tools and widgets. You can use widgets to add elements into your page, things like headings, images, text, buttons, video, whatever. Here you can also edit the details of a selected item.
Astra
Astra is a system to glue our visual theme together and handles menues, various global settings like global colors, typography and many more.
Working with WordPress
LOG IN
To log in to WordPress visit the following URLs.
Playground – Just play around here
www.letsplaypingpong.com/tradukas_playground/wp-admin
Projects – Review imported projects/references here, add translations
www.letsplaypingpong.com/tradukas_projects/wp-admin
ADMINISTRATION SCREEN
The Administration Screen provides access to the control features of your WordPress installation.
Each Administration Screen is presented in sections, the toolbar (and header), the main navigation, the work area, and the footer.
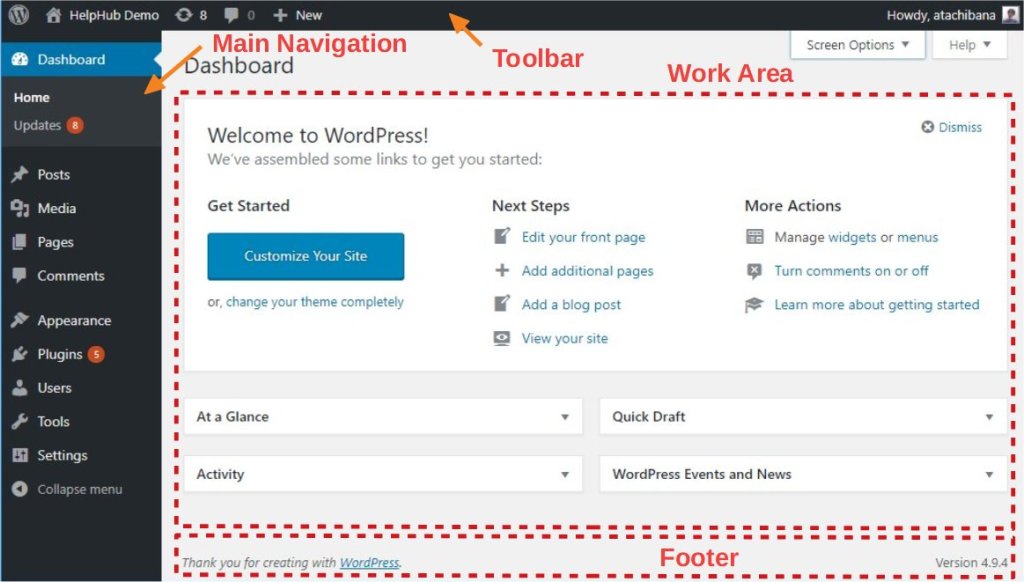
Toolbar has links to various administration functions, and is displayed at the top of each Administration Screen. Many Toolbar items expand (flyout) when hovered over to display more information.Visit Site link
In the Toolbar, to the right of the WordPress logo, your site name is displayed as a link. Hover over the site name to see the View Site link to visit the main page of your site.
Main Navigation menu details each of the administrative functions you can perform. At the bottom of that section is a Collapse menu button that shrinks the menu into a set of icons, or to expands to list them by major function. Within each major function, such as Posts, the sub-menu expands (fly-out) when hovered over, and expands fully if an item clicked.
Work area is where the specific information relating to a particular navigation choice, such as adding a new post, is presented and collected.
Footer, at the bottom of each Administration Screen in light shading, are links to WordPress, thanking you for using it, and the version of WordPress you have installed is shown.
Dashboard
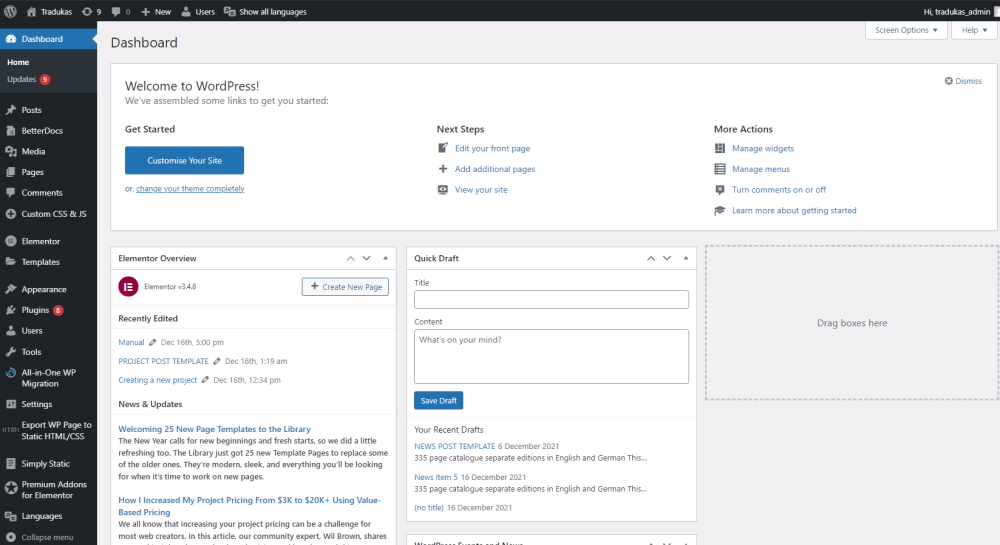
The Dashboard acts as information central and tells you about recent activity both at your site and in the WordPress community, and update information.
Updates
You can update to the latest version of WordPress, as well as update your themes, plugins, and translations from the WordPress.org repositories.
If an update is available, you᾿ll see a notification appear in the Toolbar and navigation menu. Keeping your site updated is important for security.
Posts & Pages
In WordPress, you can put content on your site as either a “post” or a “page”. When you’re writing a regular blog entry, you write a post. Posts, in a default setup, appear in reverse chronological order on your blog’s home page.
In contrast, pages are for non-chronological content: pages like “About” or “Contact” would be common examples. Pages live outside of the normal blog chronology, and are often used to present timeless information about yourself or your site — information that is always relevant. You can use Pages to organize and manage the structure of your website content.
FOLDERS
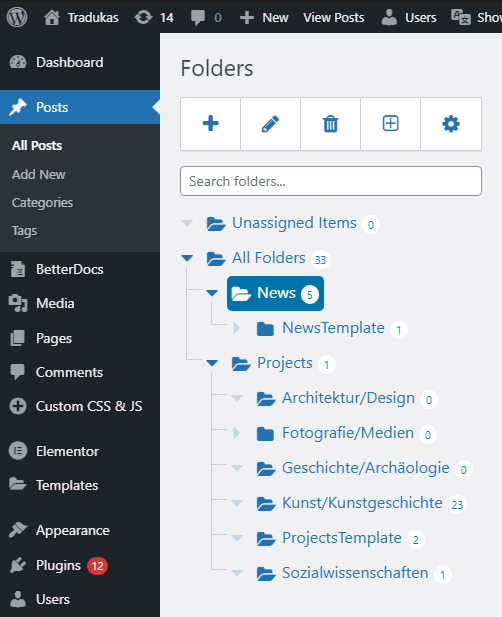
The individual posts and pages are organized in Folders. You can drag and drop posts/pages to their according folders . This helps us to keep a clean and organized structure.
For example:
Administration -> Posts -> Projects -> Sozialwissenschaften
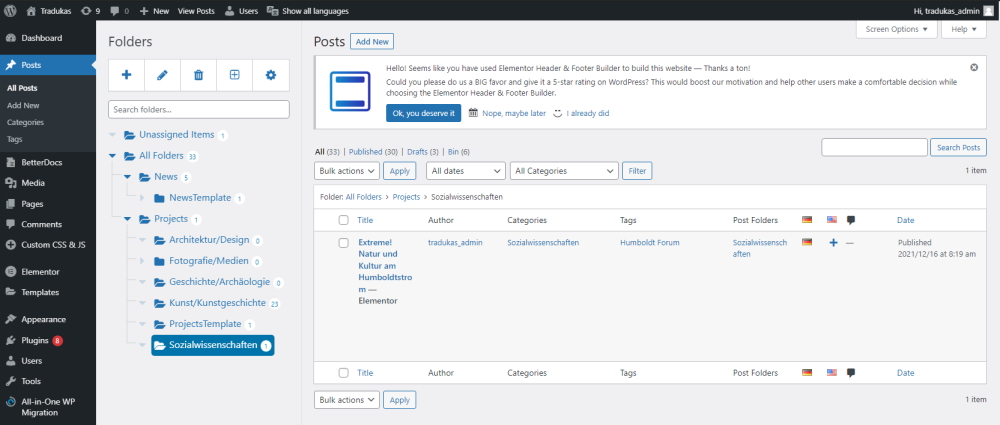
Sometimes you might get a display error which can be removed by refreshing the page (press F5) or it might indicate that your screenresolution is toosmall. That can be fixed by zooming the browserwindow smaller.
Posts
Posts are the principal element (or content) of a blog. The Posts are the writings, compositions or discussions.
In our case we defined two types of Posts to represent our data
News
Projects
(Your references)
We use Categories to assign our projects to a topic and for news items.
We use Tags to assign projects to a customer.
Working with Posts
All Posts
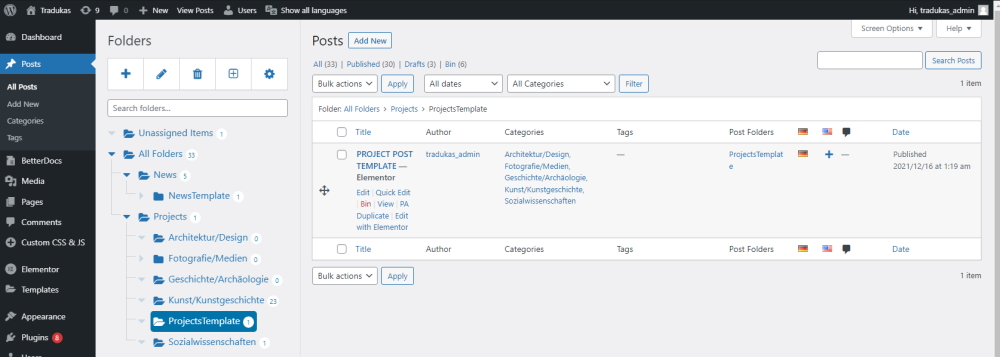
Via the All Posts Screen you can select the Post or Posts you wish to edit, delete, or view. Multiple Posts can be selected for deletion and for editing.
A handy in-line edit tool, called Quick Edit, allows you to update many fields for an individual Post.
With PA Duplicate you can create copies of Posts and Pages.
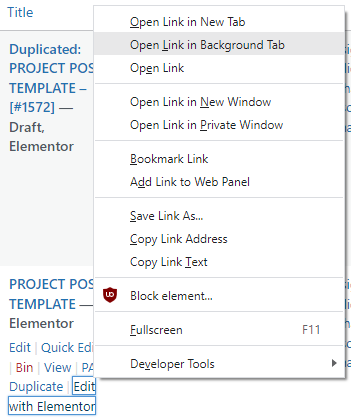
Edit with Elementor lets you edit this Post or Page with the content editor Elementor.
I suggest opening it in a new browser window for flexibility.
Various search and filtering options allow you to find the Posts you want to edit or delete.
Add New Post
Posts Add New Screen is where you write new Posts. While you are writing those Posts, you can also create new Categories and new Tags. In addition, any Media (pictures, video, recordings, files) can be uploaded and inserted into the Posts.
You will usually just copy an existing post and modify the content for a faster workflow.
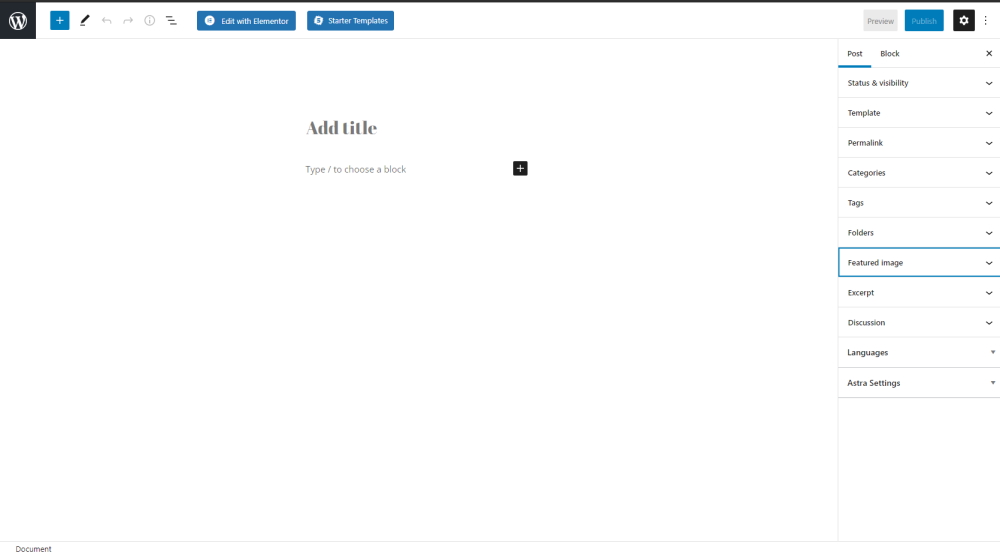
If you decide to create a new Post from scratch the Gutenberg editor shows up and you can and should add a title here and may adjust various settings here and proceed to Edit with Elementor. Many of those settings found here can also be accessed via the Quick Edit tool that we saw earlier, but here is a good place to set the featured image and disable discussions (allowing users to comment) along with choosing Categories and Tags.
You can save by clicking Publish top left to save and either return to WordPress by clicking the „W“ Logo top right corner or proceed to edit the content by clicking Edit with Elementor.
Howto: Copy an existing Post for quickly creating a new Post
Learn how to copy an existing post in WordPress and edit the content in Elementor.
Let´s say you want to add a new project(reference) with the same layout template as the others you can do so by copying an existing one and just change the content.
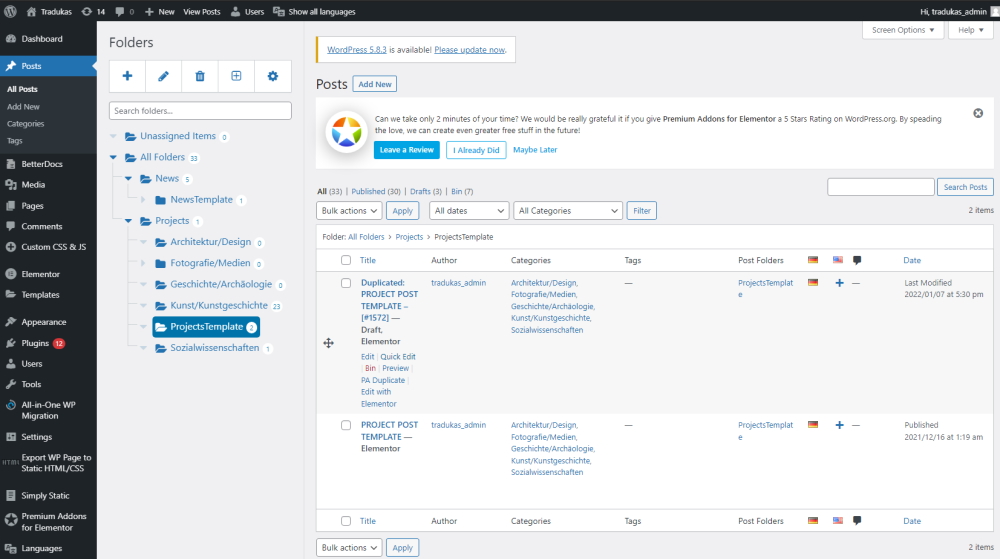
Navigate to the project template folder under
Posts->Projects->ProjectsTemplate
to find the post „PROJECT POST TEMPLATE„.
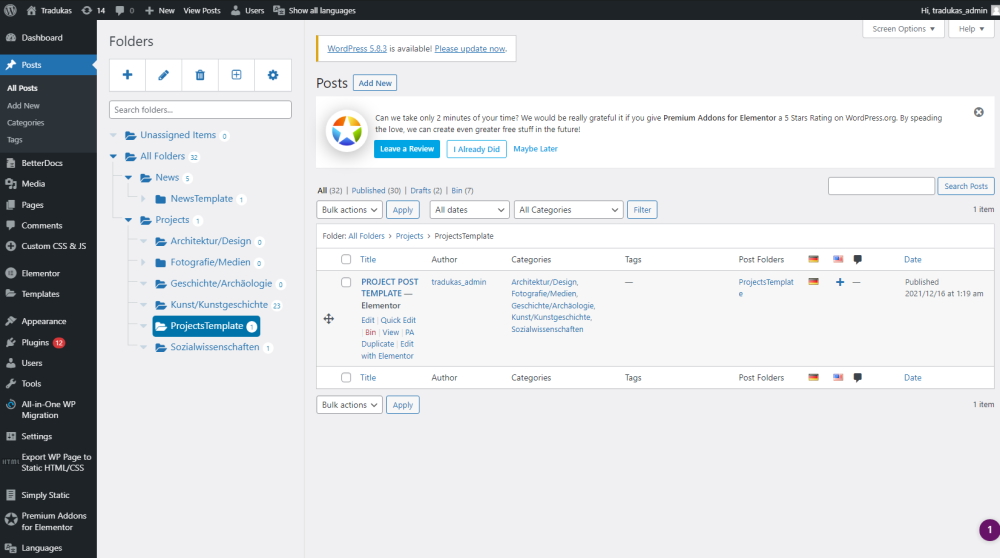
Click on „PA Duplicate“ to copy the template files
This will generate a new post with the name „Duplicated: PROJECT POST TEMPLATE – [#1572]“ (the number is an ID and varies).
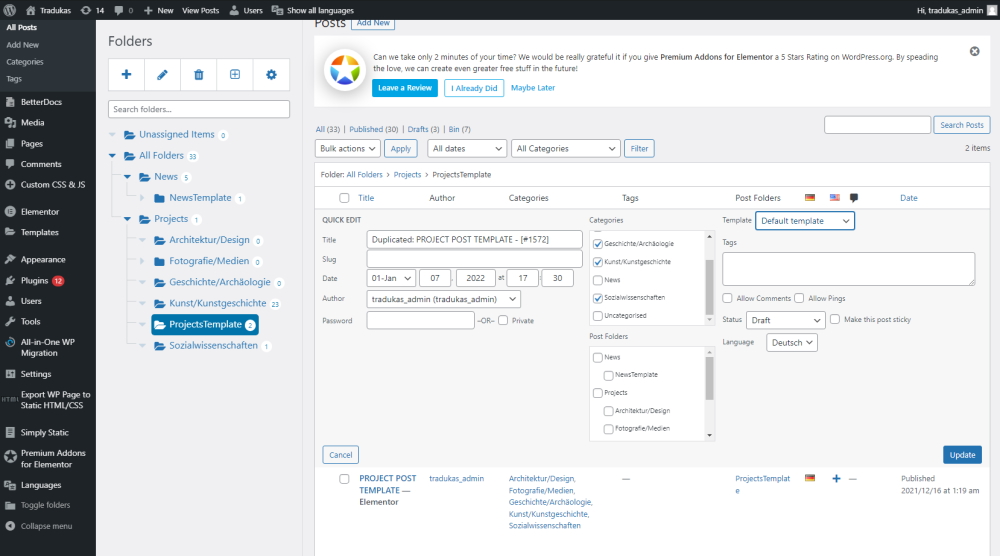
Lets Quick Edit the new duplicate to give it a proper name and set Categories and Tags. You can also set the language for translation. All Posts are set to be default as german. Adding the translation will add the english version. You can also set the Status of the Post: Draft(a hidden draft) and Published.(released to public.) You should select Publish for now
Click Update to save.
With that done click on Edit with Elementor which will open the post in our pagebuilder Elementor where we will change the actual content.
Categories
Every Post in WordPress is filed under one or more Categories. Categories allow the classification of your Posts into groups and subgroups, thereby aiding viewers in the navigation and use of your site.
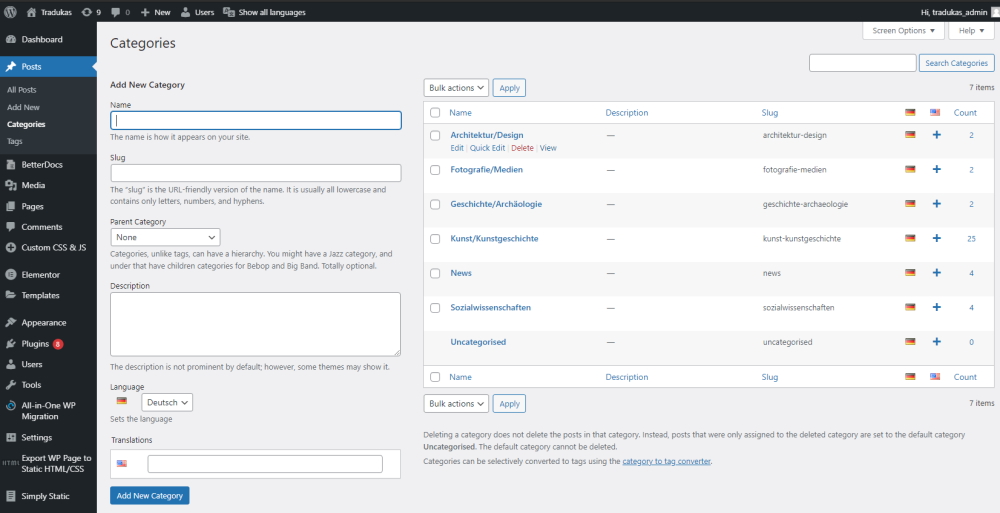
Each Category may be assigned to a Category Parent so that you may set up a hierarchy within the category structure. As an example, a hierarchy might be Project->Sozialwissenschaften. In creating categories, recognize that each category name must be unique, regardless of hierarchy.
The Posts Categories Screen allows you to add, edit, and delete Categories, as well as organize your categories hierarchically. Multiple Categories can be selected for deletion. A search option allows you to find the Categories you want to edit or delete. Also remember Categories can be added in the Posts Add New Screen.
We use categories to assign our projects to a topic and for news items.
Tags
Tags are the keywords you might assign to each post. Not to be confused with Categories, Tags have no hierarchy, meaning there’s no relationship from one Tag to another. But like Categories, Tags provide another means to aid your readers in accessing information on your blog.
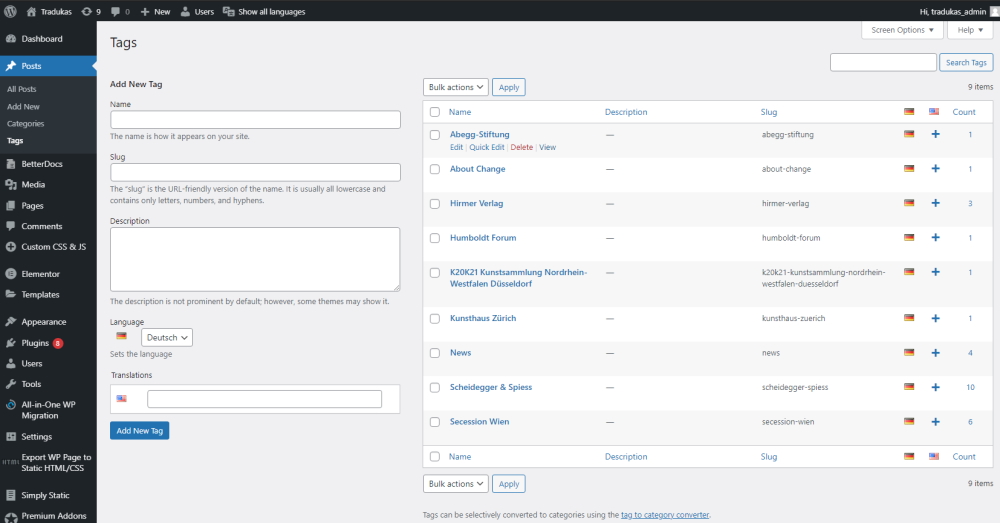
The Posts Tags Screen allows you to add, change, or delete Tags. Multiple Tags can be selected for deletion. A search option allows you to find the Tags you want to edit or delete. Also remember Tags can be added in the Posts Add New Screen.
We use Tags to assign projects to a customer.
Pages
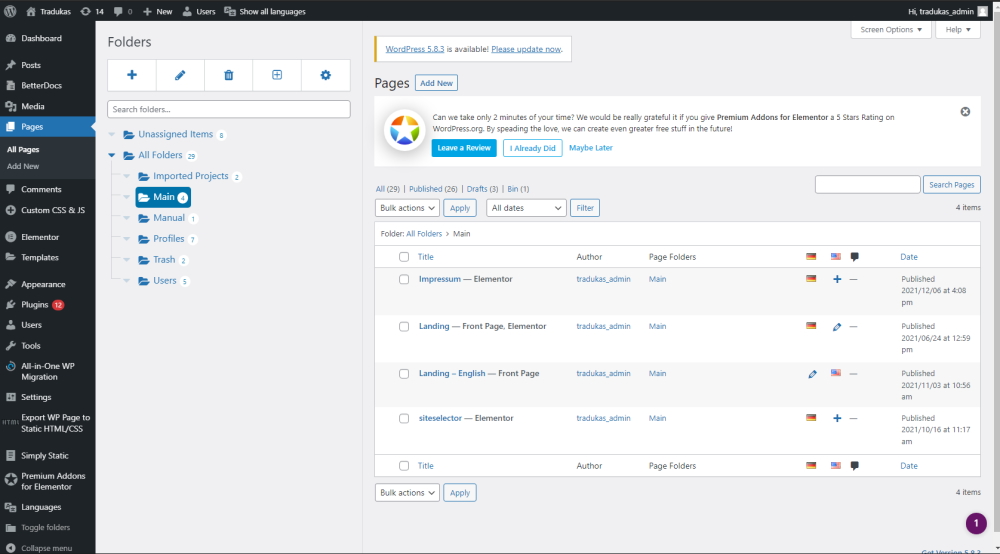
Since Pages are static by nature and we work with Posts to create News and Projects we will rarely modify our existing Pages.
Working with Pages
All Pages
The All Pages Screen provides the necessary tools to edit, delete or view existing Pages. On this Screen you can select the Page to edit, delete or view. Multiple Pages can be selected for deletion and for editing. A powerful bulk edit tool allows certain fields to be edited for a whole group of Pages. A handy in-line edit tool, called Quick Edit, allows you to update many fields for an individual Page. Various search and filtering options allow you to find the Pages you want to edit or delete.
Add New Page
The Add New Page Screen allows you to create new Pages with a wide variety of options.
x
x
Plugins
Here you find various plugins to add funtionality to wordpress and elementor.
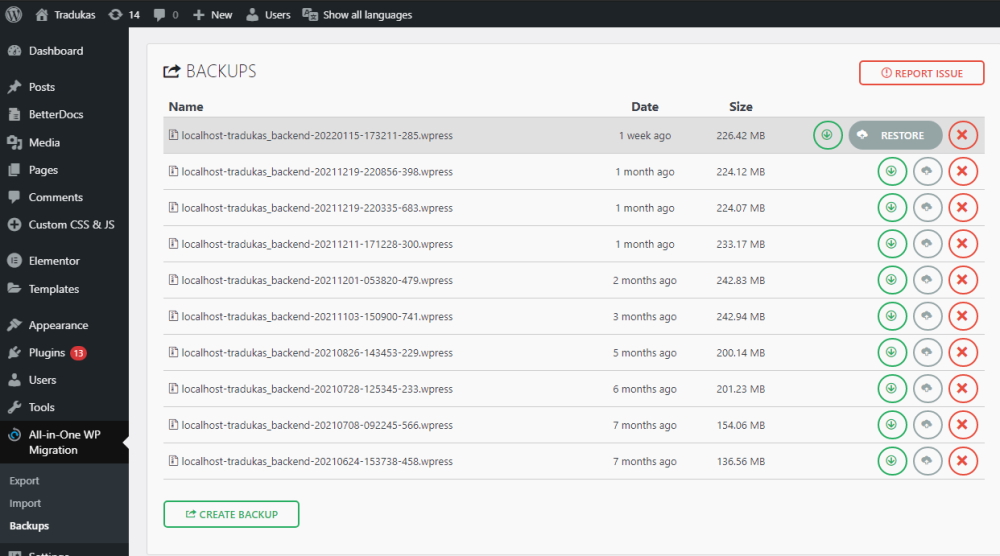
All-In-One WP Migration - Backup & Restore
This Plugin allows us to create and restore backups.
Its good to have a habit of creating a backup here before you start editing.
While being fairly selfexplanatory ist is possible to ruin the installation by trying to restore the installation. Its webbased and the browserwindow needs to be open and active during the process.
Handle with care!
SEO - Search Engine Optimisation
We will discuss SEO here.
Languages
The Languages Plugin provides a multilingual environment for WordPress.
The functionality is represented on the website by country flags next to the mainmenu.
By default all Posts(Projects/references and News Items) are created in german and require to add a translation in english
You will either see a „+“ Button (add translation) or a „pencil“ Button (translation present).
Upon clicking the „+“ Button you will create a copy which is connected to its parent, while both exist individually content wise this connection enables the language switch buttons.
By clicking „pencil“ Button you can proceed to give it a name in Gutenberg Editor and change the content in Elementor Editor.

Clicking the + button creates a linked copy of the Post or Page.
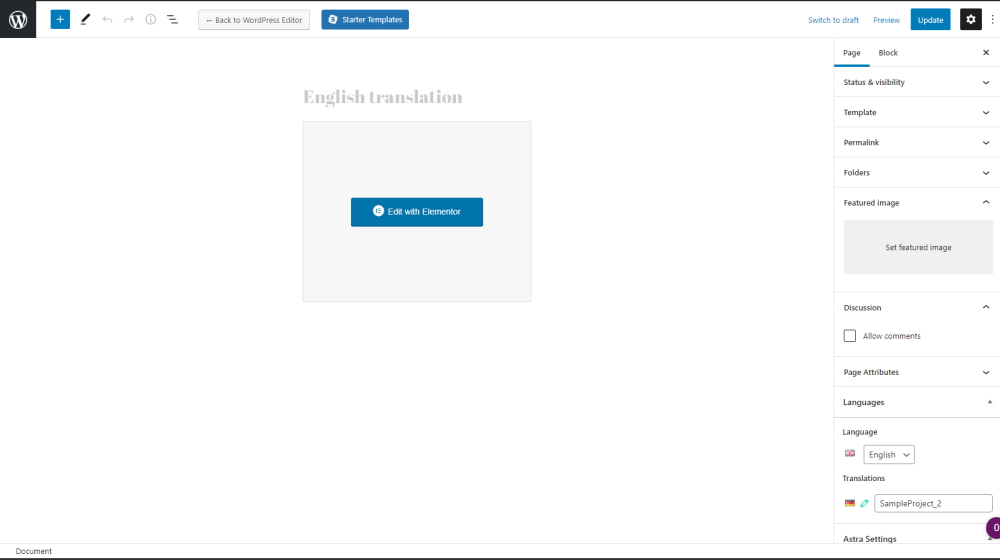
The Gutenberg editor starts and we will enter a title, in this case „English translation“.
On the right sidebar is a Language and Translations tab where you can set the current language (which should be english we are adding the translation to english) and the linked related Post, in this case „SampleProject_2“. You can also break the connection here. Don´t do that for now.
You can change the Status to „Published“ or „Draft“ under „Status & visibility“.
Click „Publish/Update“ to save-> click W Logo top left corner-> head back to wordpress or start creating the content by Edit with Elementor.
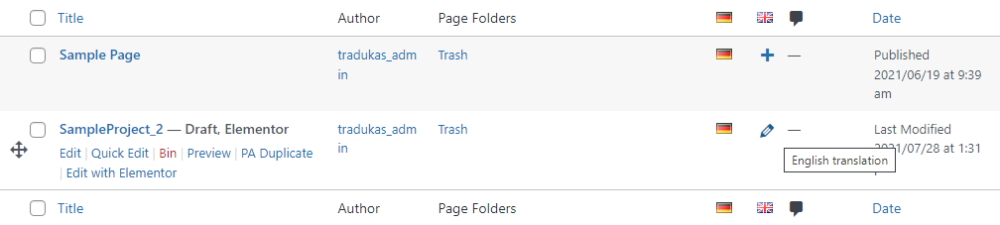
You can access the translated Post by clicking the pencil button.
Working with Elementor
Edit With Elementor
To use Elementor, you should click the “Edit With Elementor” button and open it in a new tag.
Sections
Drag Elements to Main Page
This page will be empty initially if you created a new Post or Page.
If you copied an existing one you will see some content.
Pick and drag elements from the Elementor sidebar.
Let’s create a new heading for the page. All you have to do is click on the box that says “Heading” then hold down the mouse button, and drag it to the widget area on the page (where it says “Drag widget here”).
Edit Settings
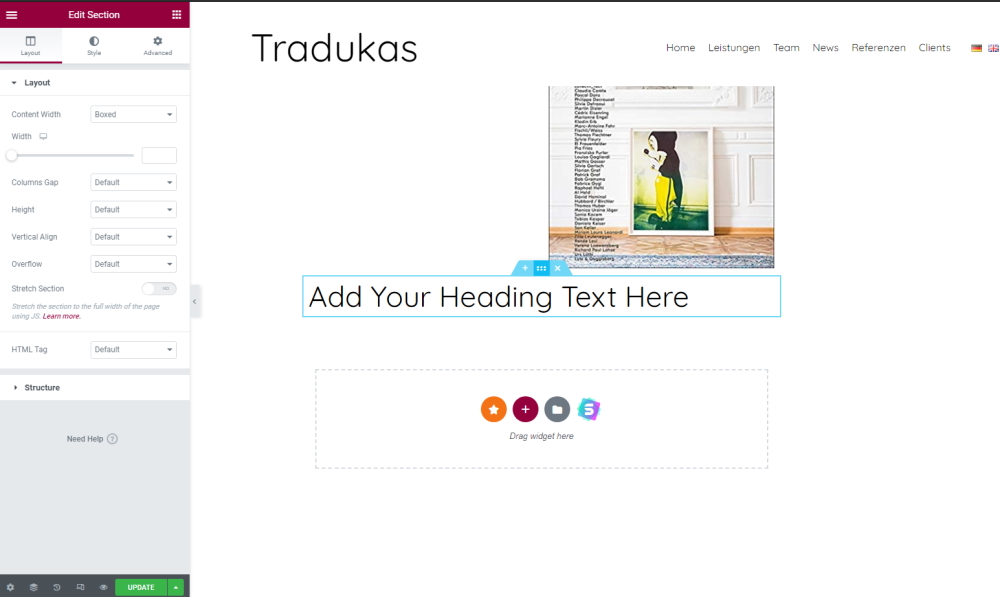
For every section or element you place on the page, you have options to customize it further. Just look for the six dots.
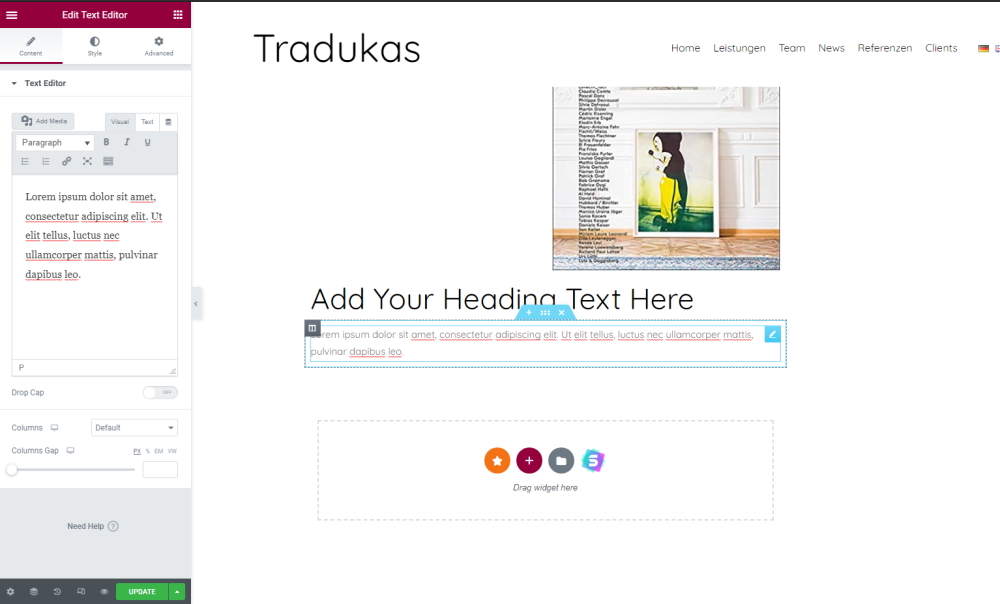
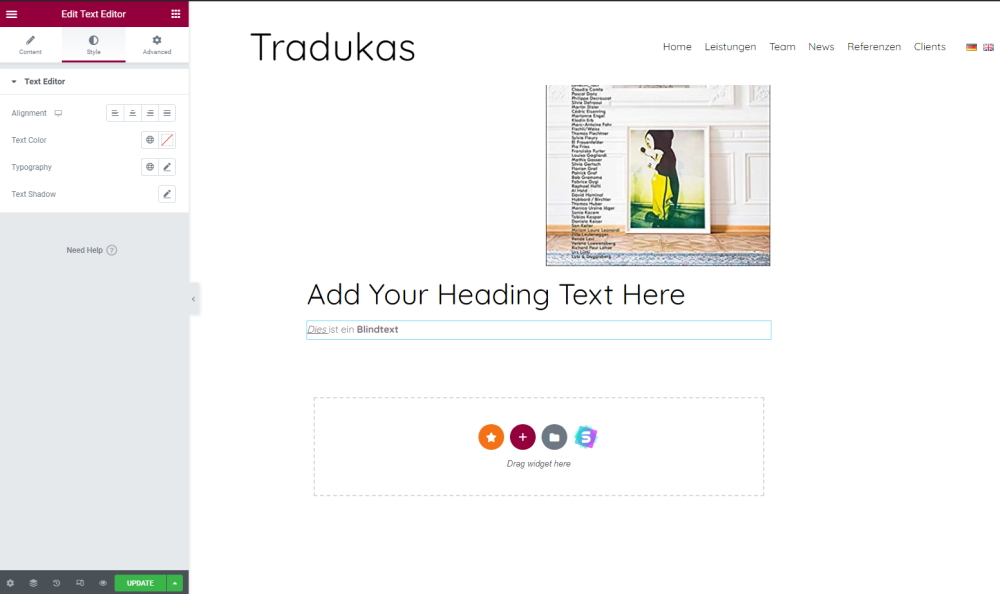
HOWTO: Edit Text
Drag the Heading element onto the canvas.
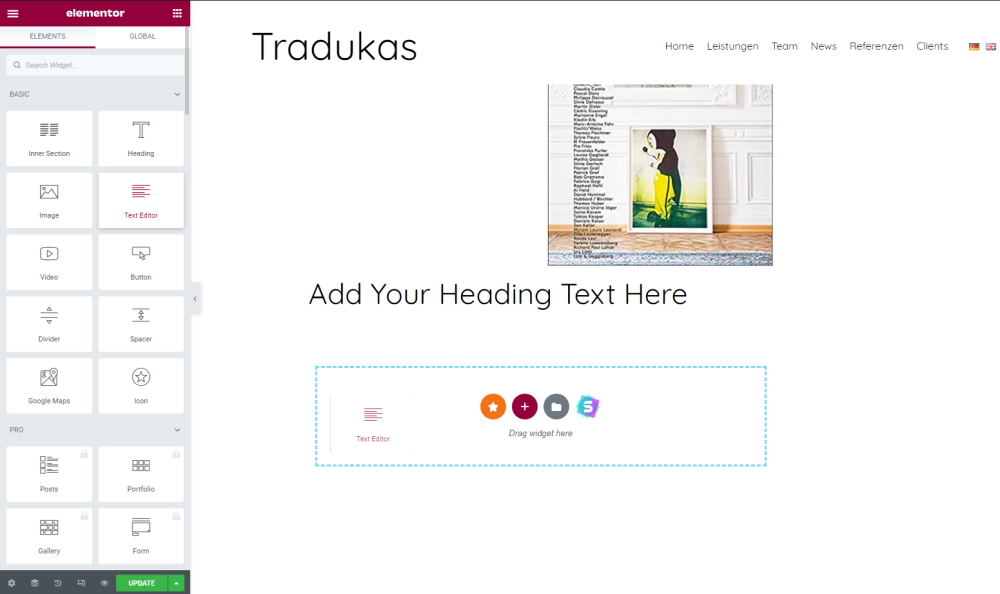
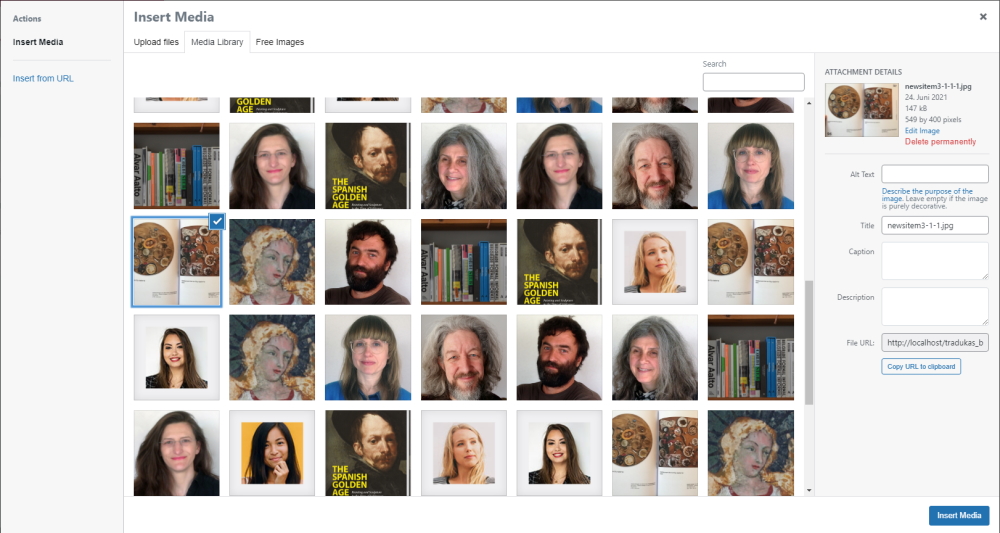
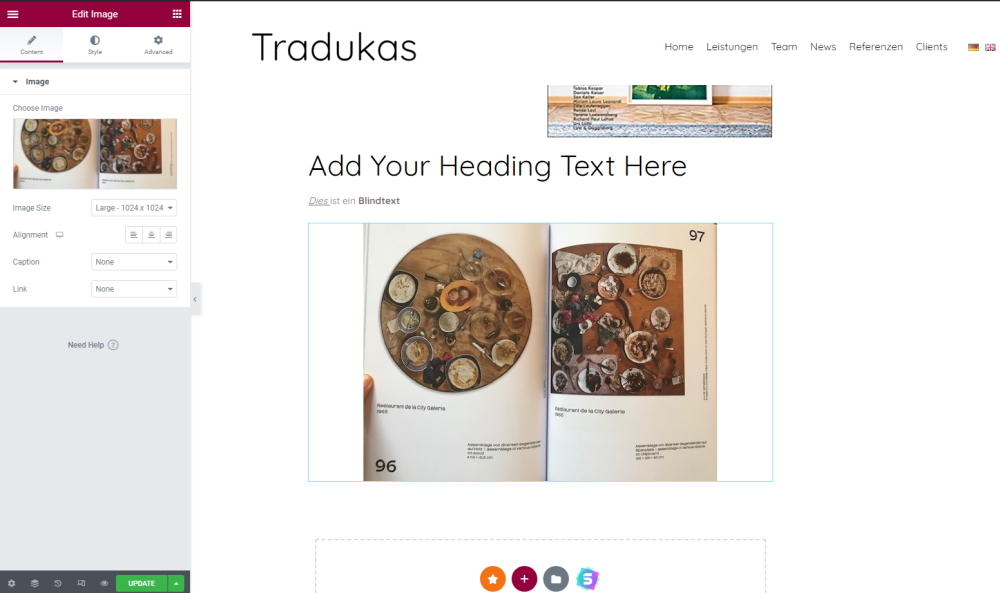
HOWTO: Change a picture
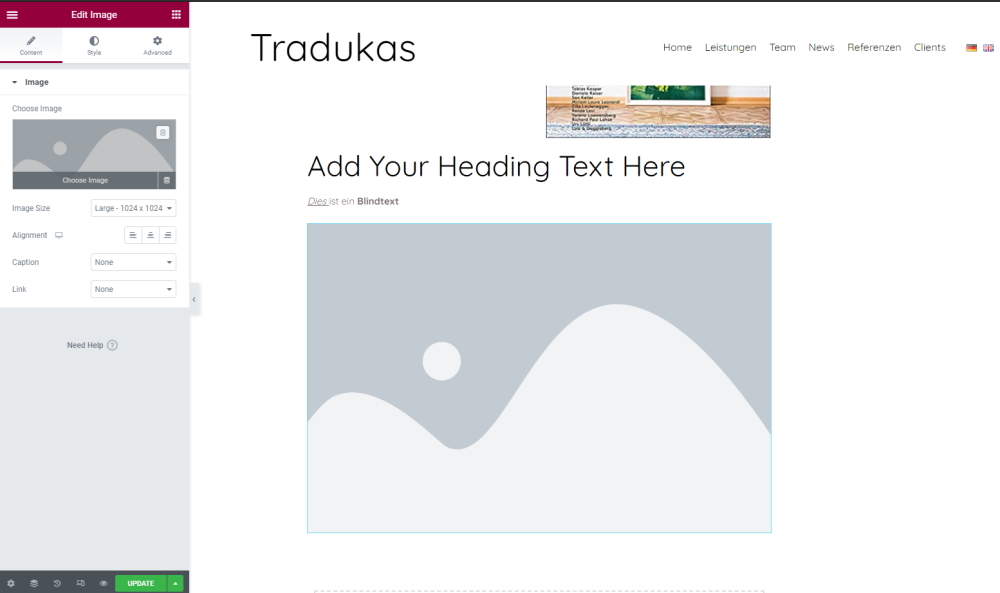
Drag the Image element onto the canvas.